Pages

Friday, March 30, 2012

When Soup's Not Enough

That lasagna soup really did a number on me.  I can't remember the last time I was so obsessed with a new recipe.  And so after making it, all I could think of was lasagna.  All the time.

It was like the soup had flicked on a switch in my head.  A switch that couldn't be flicked off.  Or at least, not without valiant effort.

Have you ever had a song verse stuck in your head?  Over and over again it plays.  And I've found the best way to get rid of it is to sing the full song out loud.  I personally tend to do this in the shower since it brings all sorts of unwanted attention in the supermarket.  I thought I would try the same technique with lasagna.  Maybe if I made an actual (non soup) version, I could get this thought unstuck.

And so I began.  Thatboy is partial to meat in his lasagnas.  Because of the brilliant sausage in the soup, I knew I wanted to use that in my lasagna - with some ground beef thrown in too of course.  Layering tomato sauce, cheese, and noodles was almost cathartic.  Like putting together pieces of a puzzle.  I knew it was going to come together in the end. 

It was smart of me to make a meat-lasagna.  It's been a while since I've done that.  The last one I made was chicken based, and while it was good, this one is far superior.  Thatboy has declared it his new favorite lasagna.  See - the way to a man's heart is definitely red meat.  As for me?  The song is still there, but at least it's died down to a hum.

Super Meaty Lasagna
1/2 pound Italian sausage
6 ounces ground beef
1/4 cup minced onion
1 clove garlic, minced
marinara sauce
salt and pepper
2 tablespoons chopped fresh parsley
6 lasagna noodles
1/2 pound ricotta cheese
1 egg yolk
1/4 teaspoon salt
6 ounces shredded mozzarella cheese
1/4 cup grated Parmesan cheese
  1. Cook sausage, ground beef, onion, and garlic over medium heat until browned. 
  2. Stir in marinara sauce. Heat through.
  3.  In a mixing bowl, combine ricotta cheese with egg yolk, parsley, and 1/4 teaspoon salt.
  4. Preheat oven to 375. Spread 3/4 cups of meat sauce in the bottom of an 8x8 baking dish. 
  5.  Arrange 2 noodles lengthwise over meat sauce. Spread with one half of the ricotta cheese mixture. Top with a third of mozzarella. Spoon 3/4 cups meat sauce over mozzarella, and sprinkle with 2 Tbsp Parmesan cheese. 
  6. Repeat layers, and top with remaining mozzarella and Parmesan cheese. Cover and bake 25 minutes.
  7. Uncover foil, and bake an additional 25 minutes. Cool for 15 minutes before serving.

Thursday, March 29, 2012

Endiv-ine

There are some vegetables that I just consider unbelievably adult.  For a number of reasons.  Beets, for example, seem grown up to me because I didn't like them before I was grown up.  Endives I always liked, but they still seem so fancy.

I can trace that one back to a party.  I don't remember what it was for, but I know I was one of the only children amid a sea of adults.  Which wasn't too unusual.  One of the guests, or maybe the host, had set out a tray of appetizers.  Endive leaves, each with a perfect scoop of goat cheese and sprinkled with pomegranate seeds.  So easy, so simple, and yet undeniably delicious.  Anything with goat cheese, right?

It was my first brush with endive, but it wouldn't be my last.  When I got older I quickly claimed the endive appetizers for myself and they made plenty of appearances at dinner parties.  I tossed endives in winter salads - their crisp, bitter, bite used to complement sweeter citrus.

Pair endives with beets and you have a truly grown up, impressive salad.  A simple vinaigrette, just some oil and vinegar, is all you need.  Because with endives, simple is always  the way to go.

Beet and Endive Salad
1 Tbsp rice vinegar
salt and pepper
 1/4 cup olive oil
2 belgian endive
2 small beets, cooked
2 hardboiled eggs
  1. Make the dressing: Place 1/4 tsp salt in vinegar and let sit for a couple of minutes.  Whisk in olive oil and pepper to taste.
  2. Remove 5 outer leaves from each endive and use them to make a star on each plate.
  3. Slice the remaining endive.  
  4. Chop the beets and eggs and toss them with the endive.
  5. Add the dressing, toss, and place in the middle of your endive star.

Wednesday, March 28, 2012

My new favorite soup


I am feeling so much better this week, even though I'm still laying low.  But that doesn't mean that I don't enjoy a nice, warm, bowl of soup. Soup always makes sick people feel better.

When I was under the weather, I was searching for soup recipes and "lasagna soup" kept popping up.  I have to be honest with you, the idea of lasagna soup really didn't send me.  Who wants to eat lasagna in a bowl?  But I consider myself open minded - so I decided to give it a try.

HOLY MACAROLI.  If soup always makes sick people feel better, than this soup could probably raise the dead.  it is Just.That.Good.

A combination between a soup and a stew with rich, spiced meat, creamy and salty ricotta, and a delectable tomato base.  It was so good that I both wanted to share it with the world and keep it all to myself.  I encourage Thatmom and Thatboy to try it, all the while kicking myself for giving it away.  I stuck the leftovers in the back of the fridge so I could enjoy it for lunches when Thatboy wasn't around.

But I have no problem sharing the recipe.  Because if you make it in your home, how could I be jealous.  Actually, as I type this, I'm thinking that maybe I would be a bit jealous.  So after you make this, go ahead and send a bowl my way. 


Lasagna Soup with Basil Ricotta Cream (from REC(ession)IPIES)

1 tbsp olive oil
1 pound uncooked Italian turkey sausage
1 onion, diced
1 green pepper, diced
½ pound mushrooms, chopped
3 cloves garlic, minced
4 cups beef broth
1 14.5 oz can diced tomatoes
1 14.5 oz can crushed tomatoes
2 tbsp tomato paste
1 10 oz. package frozen spinach, defrosted and drained
1 tbsp oregano
½ tsp red pepper flakes
½ tsp dried basil
½ tsp dried thyme
Pepper to taste
2 cups mixed broken lasagna/manicotti/shell pasta
2 tbsp grated parmesan
1 15 oz container part-skim ricotta
1/2 bunch (about 6 stems) fresh basil 
  1.  Heat olive oil in a large soup bowl.  Remove sausage from casing and cook until browned (about 5 minutes).
  2. Add  veggies into the pot, and continue cooking until  the onions are translucent, about another 5 minutes.
  3. Add broth, diced tomatoes, crushed tomatoes, tomato paste and spinach, and raise heat to high. 
  4. Add spices and bring to a boil. 
  5. Add pasta and cook approximately 8-10 minutes 
  6. Meanwhile, chop basil and stir into ricotta along with the parmesan. Serve soup in bowls topped with generous dollops of basil ricotta crème.

Tuesday, March 27, 2012

Leftover cabbage?


After St. Patrick's Day was over I had a half a head of cabbage staring at me every time I opened the fridge.  Does this happen to you too?  It's my constant cabbage complaint.  There's always too much.  I always need to plan for 2 cabbage dishes everytime I pick up a head.

For some reason, St. Patrick's Day always starts slaw season for me.  Probably because Passover follows closely on it's heels.  And slaws are fantastic snacks for during Passover.  Last year I slawed up almost every fruit and vegetable I could get my hands on - mixing them together, tossing them with vinegar.

While last year led to the discovery that I love slaw in all forms, it's the traditional cabbage slaw I'm writing about today.  According to Wikipedia, the term "Coleslaw" is an Anglicisation of the Dutch term "koolsla" referring to cabbage salad.  Wikipedia also notes that coleslaw is originally an Irish dish.

An Irish dish to use up leftover cabbage from colcannon?  Sounds like a winner to me!  I don't like mayonnaise, so this coleslaw doesn't use it.  Instead, it relies on a boiled salad dressing - fairly light and unassuming, which is just perfect to let the tangy vinegar shine through. 

Coleslaw
1/2 head of cabbage
 3/4 Tbsp flour
1/2 tsp dry mustard
1/2 Tbsp sugar
1 egg yolk, slightly beaten
cayenne pepper
3/4Tbsp butter, melted
1/4 cup milk
2 Tbsp vinegar
salt
1/2 tsp celery seed

  1.  Place the cabbage in a bowl of cold water and refrigerate 1 hour.
  2. Make the dressing: Combine flour, mustard, and sugar in a pan.  
  3. Slowly add the egg yolks, a sprinkle of cayenne, melted butter, milk, and vinegar.  
  4. Heat, stirring constantly until thickened and smooth. Remove from heat and add salt to taste.
  5. Drain the cabbage, shred, and toss with the dressing and celery seed.

Monday, March 26, 2012

Feel Good Weekend


We did a pretty good job of staying in this weekend and trying to get healthy.  On Saturday I even napped!  (I can't remember the last time I did that.)  During one of Thatbaby's naps, Thatboy and I each grabbed a corner of the couch and conked out. 

The only time we left the house was to run errands - has anyone else noticed that there seems to be a neverending list of things that need to be done on the weekends?  Luckily all our errands could be done in one shopping center. 

That shopping center just so happened to be doing their Easter Celebration this weekend.  Kids brought baskets and went "Easter egg hunting" in every store in the center.  Thatbaby didn't miss out on the fun as the store employees made sure he got his share of eggs.


The rest of the time we just tried our best to rest.  And I made sure we got our fill of comfort food.  Like my favorite - chili!  Chili always makes me feel better.  Luckily it seemed to fit in really well with the colder weather, although I know that my chili-days are near an end as the weather just has to get warmer soon.  Now that it's almost April. 

Until then fill up and feel better!


Black Bean Chili
1 lb sausage
1 lb ground beef
1 can chili hot beans
1 can black beans
4 oz tomato paste
1 onion, chopped
1 carrot, chopped
1 stalk celery, chopped
2  jalapenos, seeded and diced
1 1/4 Tbsp lemon pepper
1/2 tsp onion salt
1 1/2 Tbsp garlic powder
1 Bay leaf
2 Cups Water
1 1/2 Tbsp tabasco
1/2-2 Tbsp chili powder
Salt and pepper


  1. Cook the sausage and beef in a skillet until browned.  Set aside.
  2. Add 1 Tbsp butter to skillet and cook onion, carrots, and celery until the onion is translucent.  Remove from heat.
  3. In a large pot combine all the ingredients. Bring to a boil, then lower heat to a simmer and cook for about 1 hour and 15 minutes.

Friday, March 23, 2012

Mea Cuppa


I've been doing stupid things all day.  Like when I drove Thatbaby RIGHT past his school and had to turn around to drop him off.

Or when I locked the bathroom key in the bathroom.

Or when I went to make a phone call and realized I didn't have the phone number with me.

Or when I went to make a roast chicken tonight and looked at the recipe and realized it was supposed to marinade 6-8 hours.  Which would mean we'd be having dinner somewhere around midnight.

So it's time for another quick and easy (and foolproof) dinner.  (Because if there's a way to mess it up, I'd find it.) This makes use of stuff that we always have on hand - sausage, wonton wrappers, and cheese. Bite sized little goodies that are as easy to eat as they are to make.  And making them makes you feel much much smarter.

 Spicy Sausage Ranch Cups
wonton wrappers
1/2 lb hot Italian sausage, removed from casings
1 cup shredded cheddar jack cheese (or whatever cheese you have on hand)
1/4 cup Ranch dressing
  1. Preheat oven to 350. Cook sausage over medium high heat until browned.
  2. Mix sausage, cheese, and ranch together.
  3. Place won ton wrappers into mini muffin tins.  Fill with the sausage mixture.  Bake for 10 minutes.

Thursday, March 22, 2012

This will be better in the summer

I can't believe it's only Thursday.  It's been such a loooong week for me.  And Thursday means it's not over yet. 

I think part of the issue is that I am definitely fighting off some form of illness.  My original plan was to stay in bed all day, but I got called in to cover a deposition so into work I went.  I did leave right after the depo was over, but then I ended up running errands so I didn't get home that much earlier.

Luckily, Thatboy decided tonight would be a good night to pick up a pizza for dinner.  Which is a nice temporary reprieve when you're under the weather.  All I had to do was throw together a salad.  This is as basic a salad as you can get - tomatoes, spinach, and red onion.  In the summer this salad will sing in a much richer key but it still works when you're so stuffed up you can't taste anything.

The basic salad is highlighted by a tangy horseradish vinaigrette which couldn't be easier to make.  If you're new to making salad dressings, they're nothing to fear - mix an oil and a vinegar and then just start playing.  Often I'll use a juice of some kind, but this salad called for something a little more interesting, a little more sinus clearing.

And now I'm off to bed with the hopes that tomorrow no one will notice me napping on my desk!

Red Onion and Spinach Salad
2 cups of spinach leaves
2 tomatoes, sliced
1/2 red onion, thinly sliced
salt and pepper
2 Tbsp olive oil
3/4 Tbsp red wine vinegar
1/2 Tbsp horseradish
  1. Arrange spinach on plates and places sliced tomatoes and onions over.
  2. Sprinkle salt over the entire plate.
  3. Whisk together oil, vinegar, and horseradish in a small bowl.  Salt and pepper to taste.
  4. Pour dressing over the spinach, onion, and tomato

Wednesday, March 21, 2012

That's a SPI-cy tomato


Raise your hand if you've missed my chipotle posts.  You know, the ones where I use way too many peppers and make a meal that is far too hot for a normal person to consume?

Well my friends, if that describes you, then you are in for a treat!  I used the very last of my chipotles in a tomato soup.  Because I love tomato soup.  And it has been especially cold, rainy, and gross here (as my stuffy, congested, runny nose can attest to.  How can a nose be stuffy and runny at the same time you ask?  Well, if you figure out the answer, I'd be dying to hear it.) so soup is the perfect warm you up meal.

Except this soup?  This soup is more than a warm you up meal.  It's a burn you up from the inside meal.  The original calls for 2 chipotles in adobo, but I'm warning you, just use one.  This soup was so spicy that I ended up having to stir some cream into it.  And then serve it with a big chunk of bread to chew between spoonfuls.

We were definitely warmer.  And I'm sharing the recipe because I think it has a lot of potential if it wasn't so spicy.  The ginger and cumin give it an unexpected flavor and the smokiness of the chipotle is the perfect pairing with tomatoes.

And for those of us who aren't experiencing the abnormal heat wave, this is the perfect way to round out the winter.

 Spicy Tomato Soup (adapted from Oishii)
2 cans of Muir Glen fire roasted diced tomatoes with green chiles
1 large onion, coarsely chopped
1 clove garlic, chopped
1 chipotle peppers in adobo sauce, chopped
2 tsp. finely chopped peeled fresh ginger
3 TBS. olive oil
1/2 tsp. ground cumin
2 1/4 cups reduced-sodium chicken broth
1 TBS. sugar
2 tsp. salt
  1. Heat oil in a pot over medium heat. Cook onion, garlic, chipotle, and ginger until onion is translucent, about 8 minutes.
  2. Add cumin and cook, stirring, 1 minute.
  3. Stir in tomatoes, broth, sugar, and salt and simmer, uncovered, stirring occasionally, 20 minutes.
  4. Cool soup slightly and blend in a blender until smooth.
  5. Pour back into bowl and reheat before serving.

Tuesday, March 20, 2012

Belated St. Patrick's Day


As usual, because of Thatmom's birthday we celebrated St. Patrick's Day a day late.  I was a busy girl on Sunday cooking and baking.  The plan was to our traditional corned beef and cabbage.  As we headed to the store on Sunday morning, I asked Thatboy what else he wanted with his corned beef and cabbage and he felt that maybe boiled red potatoes would be a nice addition.

We talked about the fact that this is Thatbaby's first St. Patrick's Day, but next year he'd really be joining in on our feast.  Thatboy posited that Thatbaby would probably like corned beef, but not cabbage, since no one likes cabbage.  I never really thought about it since Thatboy has always requested corned beef and cabbage, but it turns out he's not the biggest fan of the cabbage part.  "We don't have to have cabbage" I told him.  I suggested maybe making colcannon.  He'd never heard of it.  To be fair, I didn't have a firm grasp of what it was other than that it encompassed potatoes and cabbage.  I quickly googled and found a recipe - "It's potatoes, cabbage, and bacon."  Bacon was the magic word.  Thatboy was in.


I made my standby Corned Beef recipe under the "if it ain't broke" philosophy. Besides I was messing around enough with this colcannon stuff.  Using the basic idea of potatoes, cabbage, and bacon I decided to wing it.  I've made enough braised cabbage with bacon to realize that's the way to go.  Because bacon makes cabbage better.  And cabbage cooked in bacon fat is far more flavorful than boring boiled cabbage.  It was a hit, and will definitely become a constant part of our St. Patrick's day menu. 


We rounded out the meal with Pioneer Woman's Pear Crisp which was ridiculously sweet.  A nice change from the salty St. Patrick's Day feast.

Colcannon
2 slices of bacon
1 small head of cabbage, cored and finely chopped
3 large yukon gold potatoes, peeled and diced
4 Tbsp butter
1/2 cup milk
salt and pepper

  1. In a large saucepan, cook bacon slices.  Remove bacon from pan, but leave drippings.
  2. Cook the cabbage in the bacon fat for about 5 minutes.  Add 1/4 cup of water to the pan, cover and cook for another 5 minutes. Remove cabbage from pan.
  3.  Place potatoes in the pan and cover with water.  Bring to a boil and boil potatoes for 20 minutes.
  4. Drain potatoes and return them to the pan.  Roughly mash with a fork.
  5. Chop bacon and add to the potatoes with the cabbage, butter, and milk. 
  6. Mash the potatoes until the desired consistency is reached.  Season with salt and pepper to taste.

Monday, March 19, 2012

Pretty is Important

Saturday was Thatmom's birthday.  Her original plan was to come down and spend the day in San Diego.  Going to the Little Italy Farmer's Market, checking out the museums in Balboa Park, eating at her favorite restaurants.

But Saturday was also the day the skies above opened up and decided to dump buckets of water onto Southern California.  Which necessitated a change of plans because no one wanted to hang out in outdoor venues or drive all around San Diego.

Thatmom called on her way down and suggested we all hang out at our place and watch a movie.

Sitting 5 to a couch and watching a movie is not the way anyone should spend their birthday.

I suggested a change in plans.


We headed over to a restaurant for lunch that is home of Thatmom's favorite ice cream sundae.  Thatmom loves ice cream.


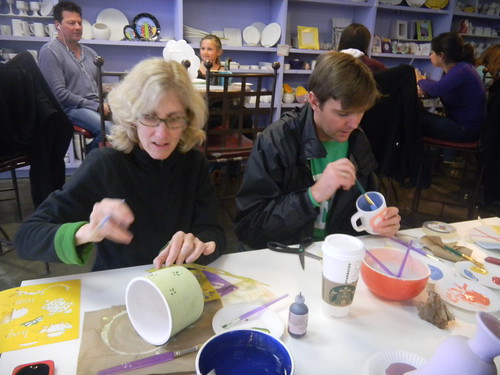
And then we headed downstairs for Arts and Crafts!  Paint your own pottery to be exact.  Thatmom painted a canister adorned with butterflies.  Thatboy spent hours painstakingly painting a mug.


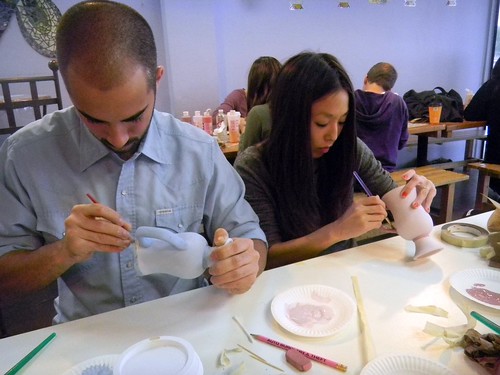
Thatbrother and UDubb worked on matching coffee cups.  They're adorable, aren't they?  And the coffee cups are cute too.


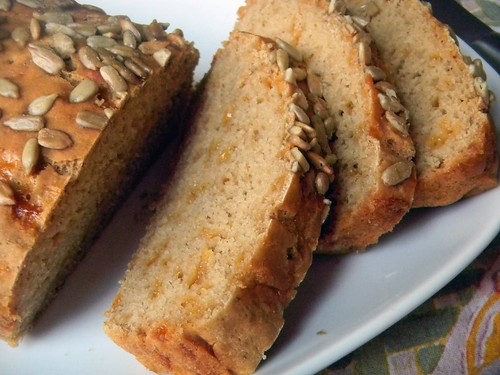
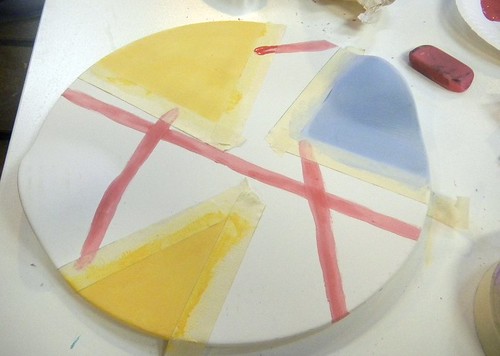
My very own work of art platter.  I think it will work equally well for bread and cheeses.


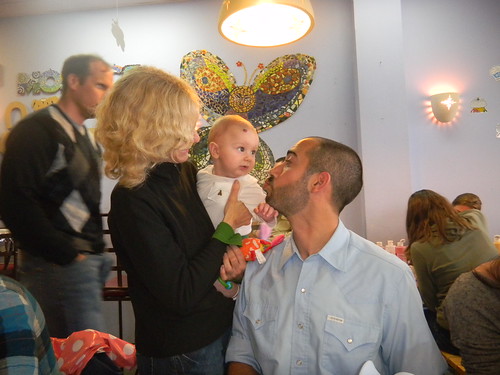
Thatbaby didn't really get to join in, but he loved the family time.  And so did Thatmom who specially requested I blog about her day.

Painting pottery is an easy way to while away the afternoon.  Before we knew it, it was dinner time.  And so we headed to another one of Thatmom's favorite restaurants.  BUT even though the place was completely deserted, they told us they couldn't seat us for another 2 hours.  So we headed to our neighborhood Chinese restaurant.

I had attempted to make Thatmom a birthday cake.  Because, as her new boyfriend rightfully stated, everyone should have a cake on their birthday.  The cake part came out beautifully.  But the frosting?  OH MY.  Disaster after disaster.  After my success with the 7-minute frosting in the Lord Baltimore Cake I attempted it again.  Beautiful, fluffy, white frosting.  Except something went wrong.  I think I got a drop of egg yolk in with the whites, because try as I might, they just wouldn't stiffen.  No peaks, no froth, just water water water.  

Well I certainly couldn't frost the cake with that.  And Thatmom was already on her way.  Time to be resourceful.  I next attempted a quick fudge frosting  - chocolate and sweetened condensed milk.  Which turned out great.  BUT I didn't really have enough time to let it cool completely.  Or make a crumb coat.  Or frost it and refrigerate so the frosting would harden.  Which means that frosting spent most of its time pooling on the plate.  And it didn't fill the center of the cake well.  I called it my delicious disaster.  The cake was a mess.  Sure it tasted fine, but we all know that looks matter.  No matter what your mother told you. 

So I'm not going to share that recipe.  You wouldn't want it anyway.  But I will share with you another cake recipe.  One that is much much prettier.  You see, when I told Thatboy I needed to make a birthday cake for Thatmom, it reminded him that he needed to bring in a dessert for a party at work.  2 cakes in one weekend?  Why not.

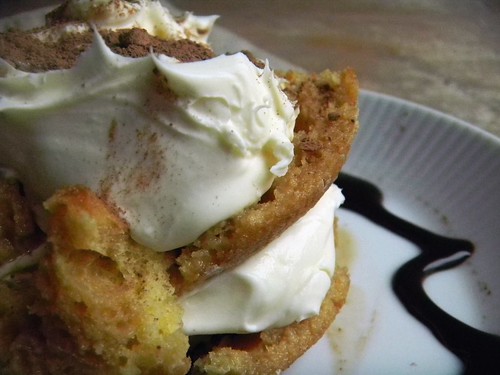
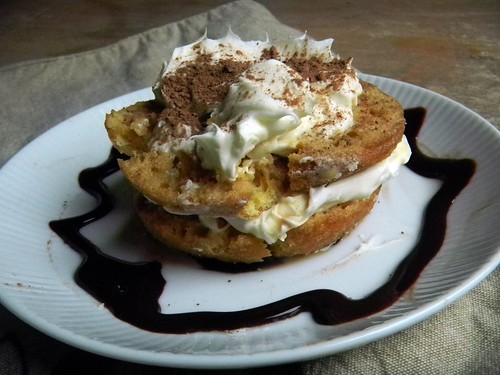
This time I went with something frosting-less.  Can't make a fool of me twice!  A Boston Cream Pie is a light butter cake filled with a rich, vanilla cream.  A sprinkle of powdered sugar adds to the beautiful simplicity.  

I haven't gotten to try it yet, but Thatboy brought me home a slice I'll have for dessert tonight.  I do know that it went over really well at his work!  Which is all that really matters anyway.  Pretty, tasty, makes people happy - it's everything I want to be.  In cake form.

Boston Cream Pie (From the Fannie Farmer Cookbook)
6 Tbsp butter
1 1/2 cup sugar
2 eggs, separated
3 tsp vanilla
1 3/4 cup cake flour
2 tsp baking powder
1/2 tsp salt
1 2/3 cup milk
3 Tbsp AP flour
2 egg yolks
powdered sugar
  1. Preheat the oven to 350.  Spray 2 8inch cake pans with baking spray. Cream the butter in an electric mixer.
  2. Add 1 cup of sugar to the butter and continue beating until light and fluffy.
  3. Add 2 of the egg yolks and vanilla and beat until blended.
  4. In a separate bowl combine the cake flour, baking powder and salt.  Alternate adding these ingredients and 2/3 cup of milk to the batter, starting and ending with the dry ingredients.
  5. In yet another bowl, beat the egg whites until they are stiff, but not dry. 
  6. Stir a third of the egg whites into the batter, then fold in the remaining egg whites.  Pour the batter into the cake pans.  Bake for 30-35 minutes.  Cool the cakes in their pans for 5 minutes before turning out onto cooling racks.
  7. While the cakes are cooling, make the cream.  Heat the remaining 1 cup of milk in a pan until very hot.
  8. Stir in the remaining 1/2 cup of sugar, flour, and 1/8 tsp salt. Continue cooking until very thick.
  9. Add the last 2 egg yolks and cook, continuing to stir for another 5 minutes. Remove from the heat, add the vanilla, and cool.
  10. When the cake is cool, spread the cream between the cake layers and dust the top with confectioner's sugar.

Friday, March 16, 2012

Pop - what a happy sound

I have a disgusting habit.

I'm a popper.

I love biting into cherry tomatoes so that they pop open in my mouth.

Because of this, I love cherry tomatoes.  I put them on all our salads.  Thatboy isn't as big of a fan.  Partly because he doesn't like tomatoes.  Partly because he's not a popper.

But as we know, I can either be very sweet to my husband, or a total wench.  This is a wench time.  A salad in which the cherry tomatoes are the star.  Everything else is merely a supporting character.

Alright, to be honest, if you had to pick a star of this salad, it would probably be the green beans.  But green beans are skinny and boring.  Not nearly as sexy as the plump, juicy, tomato.  That beauty's got curves.

Fresh green beans, crisp celery, sour olives and juicy tomatoes.  You can pick your favorite -in reality, they're all winners.

Green Bean and Cherry Tomato Salad
1 Tbsp white vinegar
salt
pepper
1/4 cup olive oil
2 cups balanced green beans
1/2 cup cherry tomatoes
1/2 cup kalamata olives
1/2 cup celery cut into 1 inch pieces
1/4 cup chopped green onions
1/2 Tbsp dried dill
1 Tbsp chopped parsley
  1. In a small bowl, combine the vinegar with 1/4 tsp salt and let sit for a minute or two, until the salt dissolves.  Whisk in the pepper and olive oil.
  2. Trim the green beans and cut them into 1 inch pieces.
  3. Toss the green beans with the tomatoes, olives, green onions, and celery.
  4. Pour the dressing over all the veggies and season with salt, dill, and parsley.

Thursday, March 15, 2012

Tiram-easy

Tiramisu is my all time favorite dessert.  To eat, that is.  I'll order it anytime it's on the menu when we're ordering dessert.

I don't especially love making it.  Mostly because it's a little labor intensive and takes a while to put together.  And while normally I'm not compelled by instant gratification, when it comes to tiramisu I just don't want to wait.  I inevitably end up taking one fingerful after another of the sweetened mascarpone while putting it together.  Or snacking on my dipped lady fingers.

So when I came upon this "instant tiramisu" recipe from local favorite Sam the Cooking Guy, I knew it was going to become my new favorite quick weeknight sweet.

Instead of messing with separating eggs, beating them, blending them in with the cheese and sugar, the recipe simplifies the process - just mascarpone, cream, and sugar.

Instead of dipping lady fingers in espresso and marsala, doughnuts are dipped in kahlua.  The original recipe calls for mini powdered sugar doughnuts, but I wanted more than a bite, so used regular size doughnuts.  We did try it with powdered sugar doughnuts and neither of us was impressed.  I much prefer the simpler old fashioned doughnuts for this dessert.

My tiramisu recipe requires almost 12 hours of refrigeration.  This requires just one.  And between you and I, it works just as well with no refrigeration at all.  Which makes this is a very dangerous dessert.  It comes together in minutes.  Which means any time you get a tiramisu craving, all you have to do is pick up some cheese and a doughnut.  We are all in trouble.  Consider yourself warned.

Doughnutmisu (from Sam the Cooking Guy)
1/2 cup mascarpone cheese
1 tablespoons heavy cream
1/2 tablespoon powdered sugar
2 doughnuts, sliced in half
2 Tbsp chocolate syrup
1/4 cup Kahlua
Cocoa powder

  1. Blend cheese, powdered sugar and cream until smooth,
  2. Put 1 tablespoon chocolate syrup on each dessert plate.
  3. Dip cut side of each doughnut in Kahlua.
  4. On top of chocolate, place 1 doughnut half.
  5. Top doughnut half with a tablespoon of the mascarpone,
  6. Repeat with second doughnut half, and mascarpone.
  7. Dust with cocoa powder.
  8. Refrigerate one hour before serving.

Wednesday, March 14, 2012

A Bright Winter Treat


I think I've mentioned before that I used to work at a Mexican/Southwestern restaurant for years.  I took so much away from the job - not just all the strange ways people pronounce guacamole and the knowledge of how much butter goes into a flour tortilla  (trust me, you don't want to know).

I picked up some great recipes and learned about flavor combinations I never would have thought of.  Like citrus and avocado.  Thinking about it, it makes so much sense.  The crispy tangy acid of the citrus and the creamy mild flavor of the avocado.  Not to mention how gorgeous the orange and green look together.  It doesn't hurt that we have an overabundance of Cara Caras in my house right now.  I seriously can't resist their sweetness.  They are my favorite kind of oranges and every winter I end up buying them by the ton.

The restaurant I worked at served their orange and avocado salad with shrimp and a raspberry chipotle vinaigrette.  And to this day, I think shrimp salads should be paired with citrus.  Partly that's because I think all salads should have fruit, and what other fruit would you serve with shrimp salad?

But I love the combination even without the shrimp.  And with a simpler orange vinaigrette.  Since this salad lacks the protein of shrimp, I usually serve it as a side, or as a lunch, where I feel like I can get away without as much protein.  You can feel free to top this with shrimp, chicken, or even some thinly sliced carne asada.  Or eat it just as it is, like me!

Citrus and Avocado Salad
1 bunch watercress
2 oranges, peeled and sliced
1 avocado
2 Tbsp canola oil
2 Tbsp orange juice
1/2 Tbsp white vinegar
1/4 tsp celery salt
2 radishes, grated
  1. Place the watercress on a plate.
  2. Evenly space out the orange slices over the watercress.
  3. Peel, dice and scatter the avocado over the oranges.
  4. In a small bowl or glass jar combine the oil, orange juice, vinegar, and celery salt.  Whisk if using a bowl, shake (covered) if using a jar.  (I like to use a jar and then refrigerate the leftovers for future use.)
  5. Pour the dressing over the salad and sprinkle the radishes over it all.

Tuesday, March 13, 2012

The Thigh's the Limit


I'm not afraid to admit it - I prefer white meat.  Call me breast-ist, call me immature, but don't worry about me going after that last drumstick.

In fact, usually if I see a recipe that calls for chicken thighs I sub in chicken breasts.  This confession is probably enough to revoke my foodie badge.  After all, chicken thighs are often revered for being more flavorful, moister, juicier - the prime part of the chicken.

I'm trying to be more broad-minded. You know, it is 2012 and all that.  So I've decided that I should probably stop being so stubborn with my substitutions. I'm not necessarily looking for chicken thigh recipes, but I'm willing to use them when I stumble across a recipe that calls for them.

And I stumbled across this one.  A crockpot chicken recipe that couldn't be easier. And with no oil or butter, it can even be qualified as "relatively healthy" if you don't pile it on top of pasta. Which of course I did.  Hey - baby steps.

\
Saucy Italian Chicken Thighs (from Cooking Light)
3 lbs boneless, skinless chicken thighs
1 can diced tomatoes
6 oz tomato paste
1/2 onion, chopped
1 clove minced garlic
1 teaspoon dried Italian seasoning
1/4 teaspoon salt
1/4 teaspoon pepper
  1. Place chicken in a crockpot. 
  2. Combine tomatoes and remaining ingredients; stir well. Pour sauce over chicken. Cover with lid, and cook on high for 1 hour.
  3. Reduce heat to low; cook 4 to 5 hours or until chicken is tender.

Monday, March 12, 2012

Learning Curve


Today was Thatbaby's first day of daycare. We tried to do all our prepping last night so that all we'd have to do was throw him in clothes and get on our way.

 Overall we were pretty successful.  I think that Daylight Savings had a hand in helping us out.  He slept past his normal morning wakeup, giving Thatboy and I time to get ready for work before he woke up.

Our little social butterfly took to his new school like a fish takes to water.  (How do you like those mixed metaphors?) He didn't even seem sad to see me leave as he explored all the new bright shiny toys and bright shiny friends.  He remained in high spirits throughout the day and was reported to be very interested in the other babies.  I was greeted by a big smile and several attempts to eat my ear, cheek, and nose.

I had been warned he would probably be exhausted when we got home.  He was.  He barely managed to stay awake for his final meal of the day and was fast asleep by 6:30.  I'm expecting a night of several wakeups ahead of me.

I really wasn't expecting such an easy bedtime routine, so I had a very easy dinner planned.  Fresh, raw vegetables in a yogurt dressing.  No cooking, and cleanup entails washing a knife, a cutting board, a grater and a bowl. 

Now what to do with all this extra time on my hands?

Yogurt and Veggie Salad
1/2 cup nonfat greek yogurt
1 Tbsp white vinegar
juice of 1/2 lemon
1 tbsp chopped chives
1 Tbsp chopped parsley
1 carrot, grated
1 beet, grated
1/2 zucchini, grated
1/2 cucumber, grated
1/4 onion, finely chopped
salt and pepper
1 bunch of watercress
1 cup cauliflower
1 cup cherry tomatoes

  1. Combine yogurt, vinegar, lemon, chives, and parsley.  Refrigerate while you put the rest of the salad together.
  2. Combine the carrots, beets, zucchini, cucumber and onion in a bowl.  Toss and gently mix.
  3. Add salt and pepper to taste.  Make a bed of watercress on a plate and pile the mixed veggies on top.  
  4. Arrange cauliflower and cherry tomatoes around.
  5. Top with yogurt mixture.

Friday, March 09, 2012

That Oh So Grown Up Feeling

For a period of time when they were young Thatmom and Thatdad worked in a Middle Eastern gourmet food store.  Maybe it's because of this that we ate a lot of Middle Eastern food when I was growing up. It could also be because we always had close family friends from Jordan, Iran, Saudi Arabia...

Whatever the reason, there seemed to be a neverending parade of baklava, baba ganoush, grape leaves, and halavah through our house. We even made hummus almost weekly and for the period of time I was a vegetarian I lived almost entirely on falafel.  The only Middle Eastern delicacy I never fully enjoyed (aside from the sheep brains eaten out of the sheep's head), was tabbouleh.

I can tell you exactly why - the parsley.  Tabbouleh is a cold grain salad, with the predominate flavors coming from the freshly chopped parsley and mint.  Lots of parsley and mint.  And as a kid I never liked parsley.  To be honest, I don't relish it now that I'm an adult either, but I am able to appreciate it and what it brings to a dish.

Which is why, now that I'm a grownup, I have learned to enjoy tabouleh.  The crisp flavors of the mint and parsley I used to despise now seem ever so refreshing.  And it is such an easy thing to throw together - great right away, but even better when you let the flavors meld together in the fridge.  (I think Alton Brown calls this the flavor tango).

This is the more traditional form of tabbouleh, made with bulgar.  However, I have made similar salads using rice, couscous, or barley and all come out equally delicious.


Tabbouleh
1 cup bulgar
5 Tbsp olive oil
juice of 1 lemon
salt and pepper to taste
1/4 cup chopped parsley
1 Tbsp chopped mint
2 green onions, finely chopped
1 tomato, diced
  1. Put the bulgar in a bowl with 1 cup of cold water and let stand for one hour.  Drain well.
  2. Toss bulgar with remaining ingredients.  Refrigerate until ready to serve.

Thursday, March 08, 2012

Beer - it's what's for dinner

It's only been almost 3 months since I got the Third Good Eats book, The Later Years.  It's about time I featured a recipe from it, don't you think?

I decided it has been far too long since I made bread, which is one of my favorite things to make.  The smell of freshly baked bread is only surpassed by that warm bread taste - because warm bread really does taste better, don't you think?

Usually when I make bread I make yeast breads.  Partly because I like to show off.  Partly because there is something therapeutic about punching down the dough.  Partly because I love the smell of the yeasty dough as it grows, filling the kitchen with it's aroma.

Because of my yeast background I was awestruck by how quickly this bread came together.  Few ingredients thrown in a bowl and then poured in a pan.  By the time you gather all the ingredients you're over halfway there!

My only complaint about this bread is a user error.  I thought a nice red ale would be perfect for the beer part of the beer bread.  I used Captain Sig's Northwestern Ale. But the beer was a little too hoppy for my tastes.  I'm sensitive to hops - Thatboy LOVES hoppy beers.  I don't.  The hoppy beer made the bread pretty hoppy.  I was able to counteract the bite by using a honey butter as spread, but in the future I'll probably use a sweeter beer, maybe a porter or a rich brown ale.

Beer Bread (From Alton Brown's Good Eats 3, The Later Years)
8 ounces all-purpose flour
4 ounces whole-wheat flour
1 tablespoon baking powder
1 1/2 teaspoons kosher salt
1 teaspoon sugar
1 teaspoon chopped fresh dill
4 1/2 ounces sharp cheddar, grated
12 ounces cold beer
1 to 2 tablespoons sunflower seeds
  1. Preheat oven to 375.  Spray a 9 x 5 loaf pan with baking spray and set aside.  Combine the flours, baking powder, salt, sugar, and dill in a large mixing bowl. 
  2. Add in the cheese and stir in the beer just to combine. Spread the batter evenly in the prepared pan. Sprinkle with the sunflower seeds.
  3. Bake on the middle rack of the oven about 45 to 55 minutes.
  4. Remove from the oven and cool in the pan for 10 minutes. Transfer the loaf to a cooling rack for 10 to 15 minutes before slicing and serving.

Wednesday, March 07, 2012

Subbing in

There is something necessarily comforting about the casserole.  The creaminess of it, the heat, scooping it out of a casserole dish and onto an awaiting plate.

However, I frequently have an issue with the ingredients in casserole.  I tend to create my own rather than working with a recipe that calls for things I can't stand, like mayonnaise or cream of X soup.  The plus side of making my own casseroles, means I have a fairly good base of knowledge on how to create the same delicious effect without those ingredients.

When looking for a way to use up some leftover water chestnuts (HA!  I bet you thought I was going to say Chipotles!)  I stumbled across the recipe for an "Unforgettable Chicken Casserole."  It's been a while since we had casserole, and I liked the idea of using the water chestnuts in a non-stirfry type dish.  But this is one of the most stereotypical casserole dishes out there and therefore had to be grossly modified to pass muster on my table.

The original recipe calls for 1 cup sour cream, 1 cup mayonnaise, and a can of cream of chicken soup.  Just thinking about it almost makes me arteries close up in protest.  To be fair, I can't promise that my solution is much healthier - butter isn't winning any awards lately,  but I do prefer a nice white sauce as a base, and then I can control the fats and sodium that go into it.  Typically I would make this white sauce with skim milk.  It's just how we do things around here.  But to get the "sour cream" kick, I made this with lowfat buttermilk.  Buttermilk and chicken just go so well together.  In fact, the only thing that buttermilk and chicken need to sweeten the pot is nice quick fry.  Which is accomplished by topping the casserole with fried onion strings.  The onion strings are also part of the original recipe - calling for a can of them.  However, once again I like to take matters into my own hand where I have more control, and I made my own.  And it's a great way to use up some of that buttermilk you now have hanging out in your fridge!

Buttermilk Chicken Casserole (adapted from Unforgettable Chicken Casserole)
1 large sweet onion (vidalia, maui, etc.), sliced thin
3 cups of buttermilk
1/2 cup of flour 
canola or peanut oil (for frying)
4 Tbsp butter
3 cups chopped cooked chicken
2 cups finely chopped celery
1 cup shredded Cheddar cheese
1 can water chestnuts, drained and chopped
1/2 cup slivered almonds


  1. Make the onion rings.  Separate the slices of onions into their rings.  Put them in a shallow dish and pour 1 cup of the buttermilk over.  Soak for 30 minutes, turning halfway through.
  2. Spread 1/4 cup of the flour in another shallow dish and dip the rings into this mixture, coating them completely.
  3. Heat the oil to 370.  Fry the rings in batches until they are golden brown - you want them pretty crispy for this dish.  Place on paper towel to drain.
  4. While onions are cooling, preheat the oven to 350 and melt the butter in a saucepan over low heat.  
  5. Add the remaining flour, stirring until combined.  Continue cooking and stirring until a bubbly paste forms.
  6. Slowly pour in the remaining buttermilk, stirring as it is added in.  Continue cooking until the sauce thickens (2-3 minutes).
  7. Add the chicken, celery, cheese, water chestnuts and almonds to the sauce.  Stir until combined and then spoon into a casserole dish. Bake for 40 minutes.
  8. Crumble the onion rings over the top of the casserole. Bake 5 more minutes or until bubbly around edges. Let stand 10 minutes before serving.

Tuesday, March 06, 2012

Cool as a...


I've never been one of those "ladies who lunch" but I have to say, the imagery captivates me.  I adore the idea of getting together with my best gal pals in beautiful clothing, eating dainty bites of salads and gossiping over the latest charity function I've thrown on my beautifully manicured lawns.


Unfortunately I have neither beautifully manicured lawns nor beautiful clothing.  When my friends and I get together we are more apt to drink margaritas than eat salads, although the gossip is always there in full force.  This weekend it was beautiful out.  Sunny and warm, more of a summer day than even spring.  We met with friends for lunch on Saturday, but lunching at McDonalds is decidedly un-"ladies who lunch." 

But since when has reality ever stood in my way? 


Instead, I cast my thoughts to cool, refreshing, summer salads.  Perfect for a balmy March day.  Crisp bites of cucumber are exactly what I would serve at my manicured lawn parties.  The tang of vinegar would be matched only by the sharp tongue of my companions. And between our sips of lemonade we would marvel at how one little vegetable can transport one right out of their own life and into something far more fanciful.

Garlic Cucumber Salad
1 cucumber, peeled and thinly sliced
1 clove of garlic, peeled
salt
2 Tbsp vinegar
1 Tbsp sugar
  1. Place the cucumbers in a bowl and cover with water.  Add the garlic and sprinkle with salt.  Let stand 1 hour.
  2. Drain the cucumbers and discard the garlic.  Place the cucumbers back in the bowl.
  3. In a small separate bowl, stir in the vinegar, sugar, and a Tablespoon of water until the sugar is dissolved. Pour over the cucumbers and stir.  Salt to taste.  Chill before serving.
Tangy Cucumber Salad
1 cucumber
salt
2 Tbsp greek yogurt
1 green onion, minced
juice of half a lemon
1 Tbsp vinegar
1/4 tsp dry mustard
1/2 Tbsp dill, minced
  1. Peel the cucumber and slice thin.  Spread over the bottom of a colander and sprinkle salt on top.  Let them drain for 30 minutes and chill.
  2. Blend the greek yogurt, green onion, lemon juice, vinegar, and dry mustard together.  Salt to taste.
  3. Toss the dressing with the cucumber and sprinkle with the dill. Chill before serving.

Monday, March 05, 2012

Morning Meals

 They say that breakfast is the most important meal of the day.  I don't know if that's true or not, but I do enjoy making breakfast foods.  Omelets, pancakes, muffins.  Although most mornings I'm pretty boring, pouring myself a bowl of cereal and calling it a meal.

A couple weeks ago I entered a giveaway on Cara's Cravings and won a new breakfast treat!  Paleonola Granola!


Paleonola is a grain free granola.  I've got nothing against grains, but even I didn't miss them at all from this granola.  I wouldn't have even known it was grain free if ...well, if I hadn't had known it was grain free!

My other breakfast excitement came in the form of some muffins.  It's been a while since I made muffins and I love having them on-hand for a quick breakfast or snack.  And they're easy for Thatboy to take to work too.

If you recall I'm trying to use my cookbooks more, so I flipped open my Ellie Krieger book for the recipe.  I adore Ellie Krieger by the way.  And this recipe might be my new favorite of hers.  It is definitely my new favorite muffin recipe.

Growing up bran muffins always seemed so grown up - I was never into them.  Bran doesn't even sound like something you'd want to eat.  And then, sometime in junior high I discovered Cracklin' Oat Bran in our pantry.  Sweet little branny o's.  I was in love.  Those things were fantastic.  And then I became a big fan of bran muffins and their inherent sweetness.  Thatboy likes them really sticky, but I like mine more muffiny.

While bran seems to pair naturally with raisins, I think my favorite part of these muffins is the use of fig instead of raisins.  Figs are far superior than raisins when not in muffins, so it makes sense that the inclusion of figs in these muffins elevates them beyond the everyday.

Fig Bran Muffins (From Ellie Krieger's So Easy)

Cooking spray
1 cup chopped dried figs, plus 3 whole dried figs
1 1/2 cups bran cereal
1 cup milk
1 1/2 cups whole-wheat flour
1 tablespoon baking powder
1/2 teaspoon salt
3/4 cup unsweetened applesauce
1/2 cup honey
1/3 cup canola oil
2 tablespoons unsulfured molasses
1 large egg, beaten
  1. Preheat oven to 400 degrees F. Coat a 12-capacity muffin pan with cooking spray. Thinly slice the whole figs.
  2. In a large bowl, combine the cereal and milk. Let sit until softened, about 5 minutes. 
  3. Whisk the flour, baking powder and salt in a separate bowl.
  4. Add the applesauce, honey, oil, molasses, and egg to the cereal mixture and stir until combined.
  5. Add the flour mixture and stir until just combined.
  6. Gently stir in the chopped figs. Spoon the batter into the prepared pan and top each muffin with a fig slice. Tap the pan on the counter a few times to remove any air bubbles.
    Bake for about 20 minutes or until a wooden toothpick inserted in center of 1 of the muffins comes out clean. Let cool on a wire rack for 15 minutes. If necessary, run a knife around the muffins to loosen. Unmold and cool completely on a rack.